This is a tutorial only. No login is required.
INTRODUCTION
This guide reviews how CSUN staff granted security access to the Schedule of Classes (SOC) customize SOC pages. Specifically, how to consolidate the contents of two tabs into one for the Update Sections of a Class component.
![]() Do NOT use the Personalize Page link that appears with "New Window | Help | Personalize Page" features. Changing page settings here can interfere with your SOC display after an upgrade. Only use the "Personalize" link that appears in the row counter banner ("Personalize | Find | View All").
Do NOT use the Personalize Page link that appears with "New Window | Help | Personalize Page" features. Changing page settings here can interfere with your SOC display after an upgrade. Only use the "Personalize" link that appears in the row counter banner ("Personalize | Find | View All").
Step 1
- Log into myNorthridge Portal.
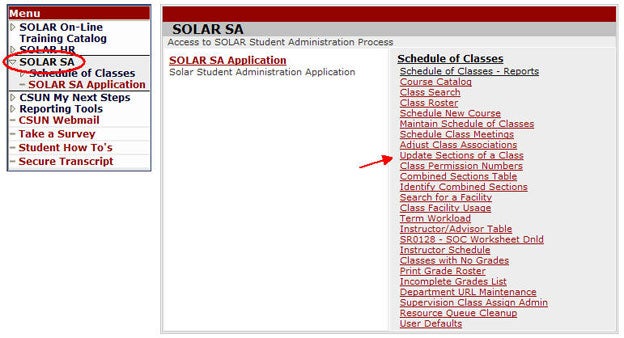
- Under the Staff Tab, click SOLAR SA.
- Click Update Sections of a Class.
Step 2
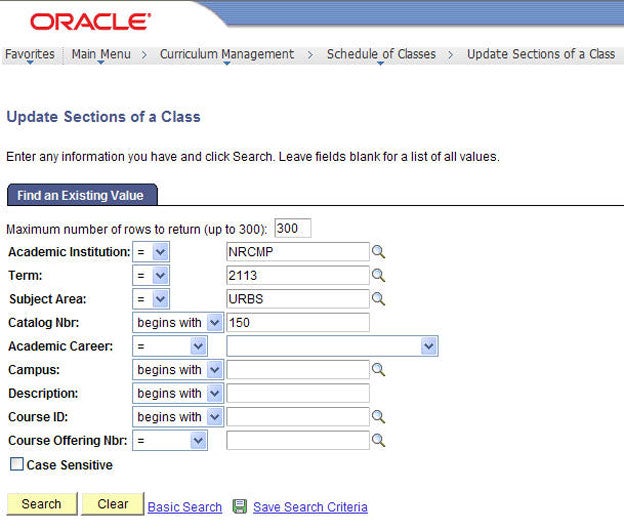
On the Find an Existing Value page:
- Enter the Term
- Enter a Subject
- Enter the Catalog Nbr (if known)
- Click Search
Step 3
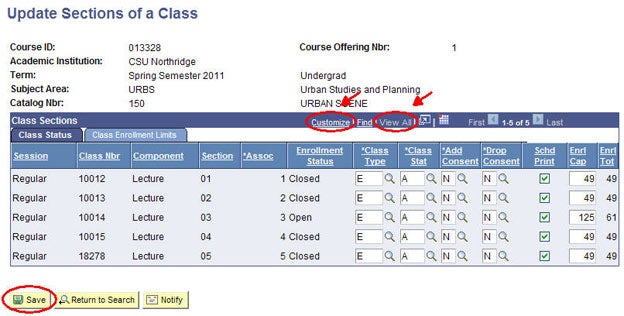
The Update Sections of a Class page displays.
- Click the Personalize or Customize link from the Class Sections navigation bar (same place as Find, View All and navigation arrows).
Step 4
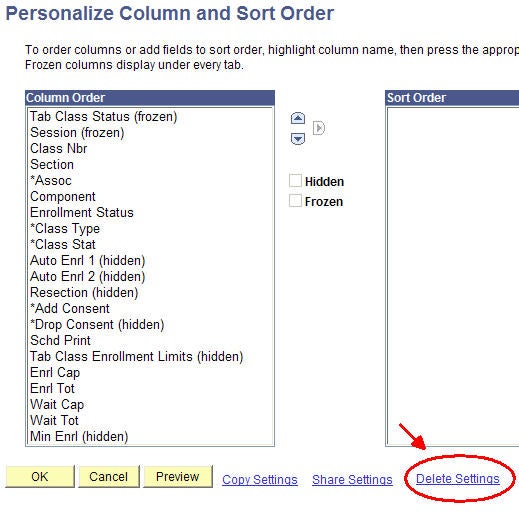
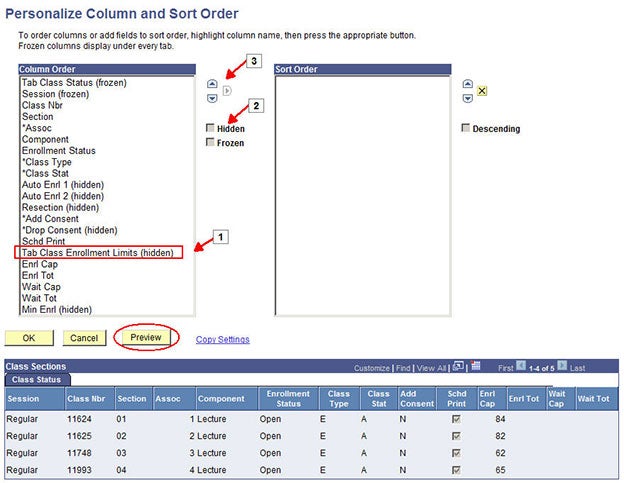
The Personalize Column and Sort Order page displays.
To consolidate values:
- Click Tab Class Enrollment Limits (#1) and check Hidden (#2). This hides the Class Enrollments page and moves its entire contents to the remaining page.
- Hide unwanted columns: Select the desired column title and check the Hidden box.
- Sort order: Select a column title and click the up or down arrow to change the order of the columns.
- When done, click the Preview button to view your work.
- When satisfied, click the OK button to save.
Step 5
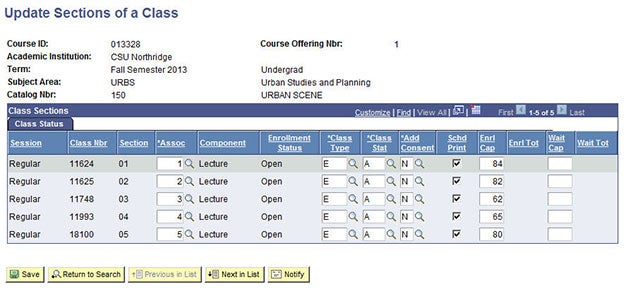
The saved results display and will remain until you return to the Personalize page to modify the settings and save.
Step 6
You may return to the Customize menu to make adjustments.
- Reset the display back to the system default by clicking the Delete Setting link at the bottom of the page.
Congratulations! You customized the Update Sections of a Class.
