This is a tutorial only. No login is required.
INTRODUCTION
This guide explains how to drop and/or swap classes.
- Use the Drop feature to withdraw from one or more classes.
- Use the Swap feature to exchange a class in which you are currently enrolled for a new one. Swapping allows you to add and drop the two classes at the same time.
You can add, drop and swap classes, or change the basis of grading, online throughout the registration periods. For dates and rules, see:
Tips:
- It is your responsibility to drop a class that you no longer want. Drop all classes if you need to withdraw from the entire term or semester. Not dropping may result in the assignment of failing grades and more. Please review Withdrawals.
- If you are reducing the number of enrolled units, please review the precautions at Academic Program Changes.
- Swapping a class in which you are enrolled with a new class has one advantage: If the swap doesn’t work, you won’t risk losing the enrolled class.
Step 1
Go to the CSUN home page at www.csun.edu and:
- Open the MyCSUN menu in the top navigation.
- Select the CSUN Portal link.
- Log in with your CSUN user ID and password.

Step 2
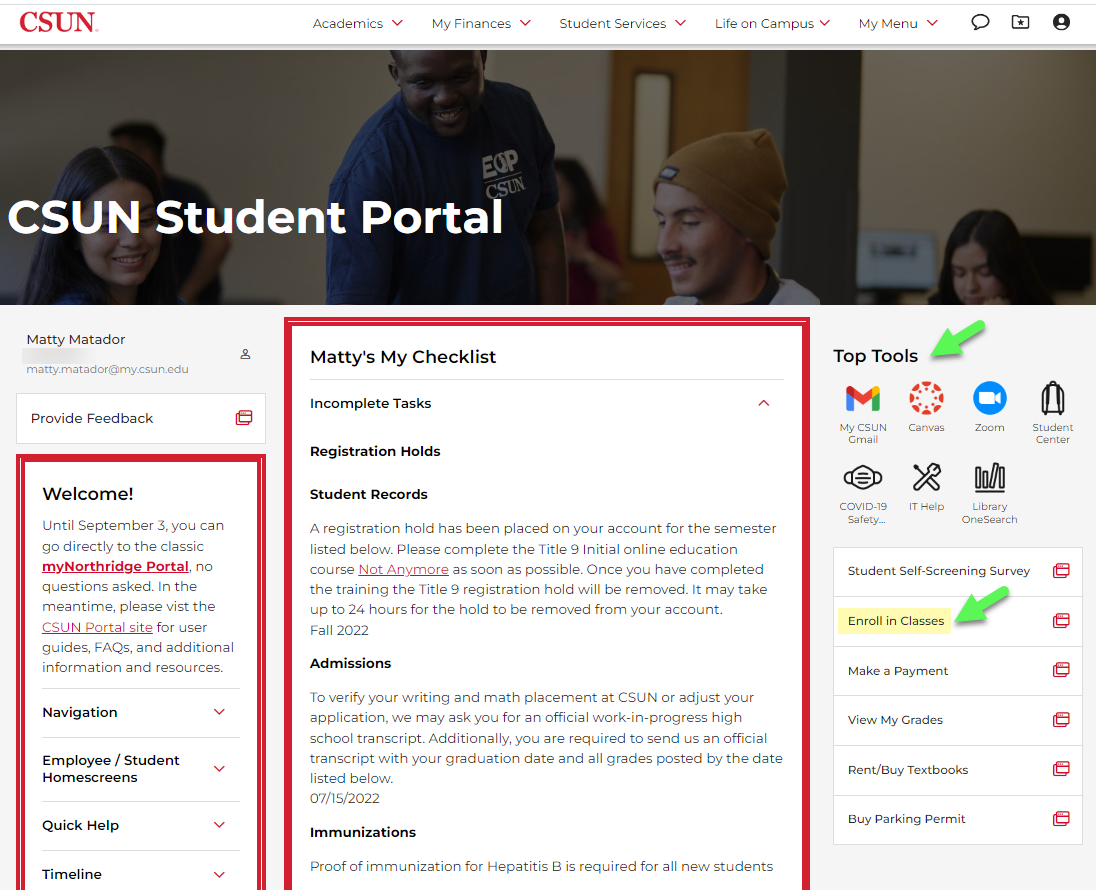
The CSUN Portal home page displays.
- In the panel of links just below the Top Tools section, select Enroll in Classes.
- On the next page that displays, select the term in which you want to drop or swap classes (not shown).
Step 3
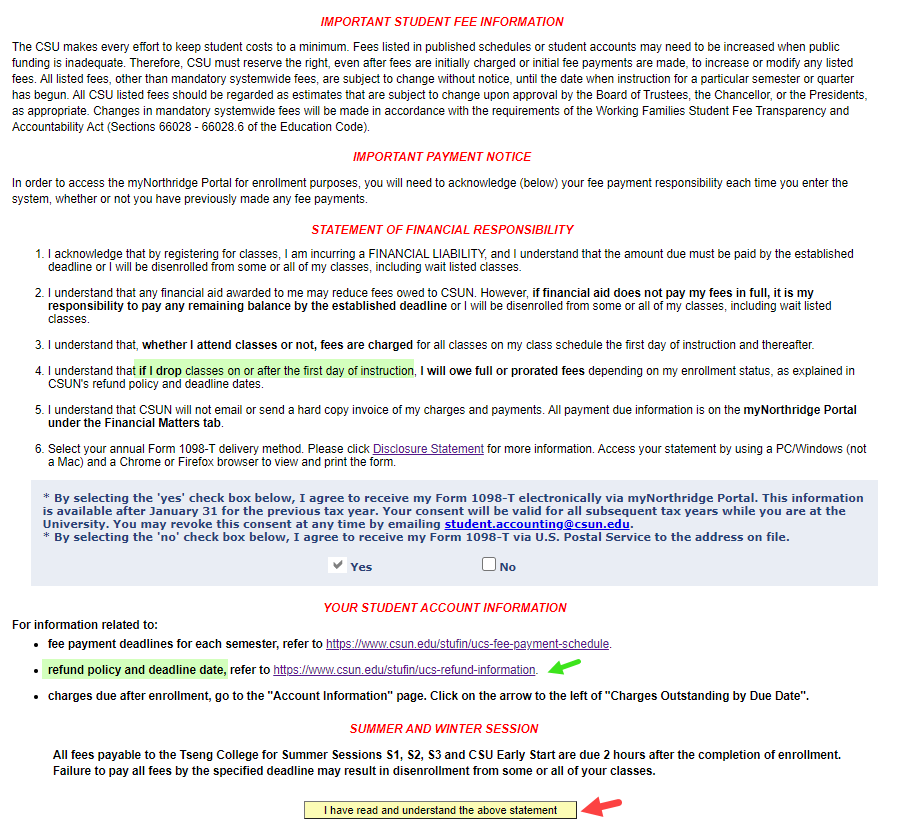
The Student Fee Payment Notice displays important disclosures, financial responsibility acknowledgements, Form 1098-T tax credit information, where to find your account charges, and links to payment deadlines and refund information.
To continue:
- Read the Statement of Financial Responsibility.
- If you agree, select the button "I have read and understand the above statement."
To cancel, return to the portal or the Student Center, or log out (links not shown).
Step 4
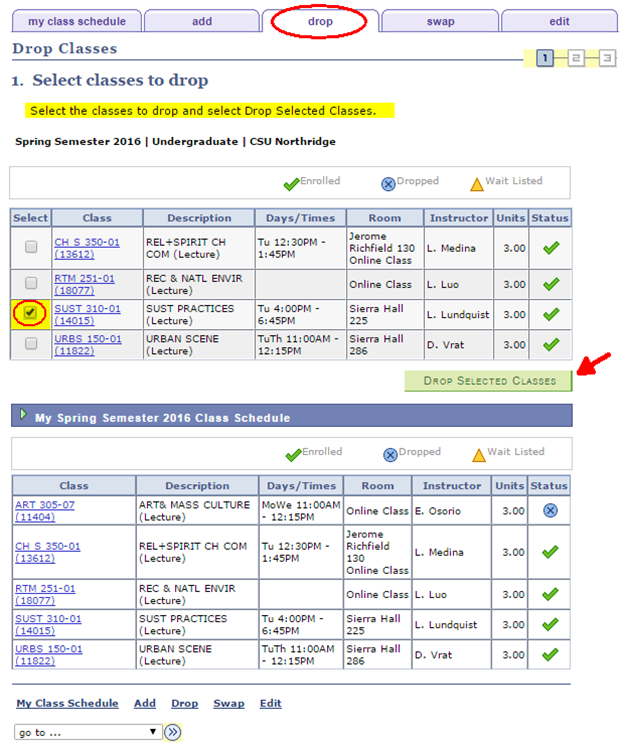
Select the desired action—drop or swap—using the tabs at the top of the Add Classes page.
When the Drop Classes page displays, select the class(es) you want to drop. Proofread your selections!
Select the Drop Selected Classes button.
Step 5
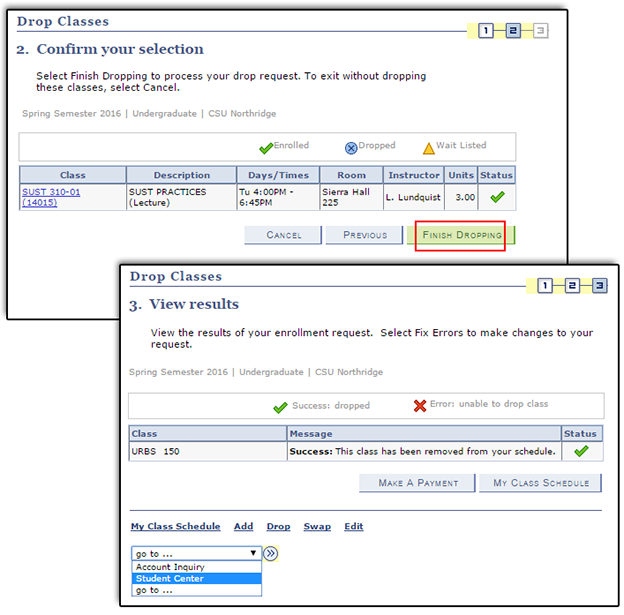
- 2. Confirm your selection—Verify your selection (or cancel it). If satisfied, click Finish Dropping.
- 3. View results—Errors found or success.
If errors are found, review the message for instructions to fix the problem. If necessary, take a screen shot of the message to discuss with faculty or staff.
If successful, check your account balance and your current schedule using the Make a Payment and My Class Schedule buttons.
![]() Always check your account balance and payment due dates after updating your schedule. Print a copy of your class schedule for your records. If decreasing units, learn more about Student Refunds.
Always check your account balance and payment due dates after updating your schedule. Print a copy of your class schedule for your records. If decreasing units, learn more about Student Refunds.
Step 6
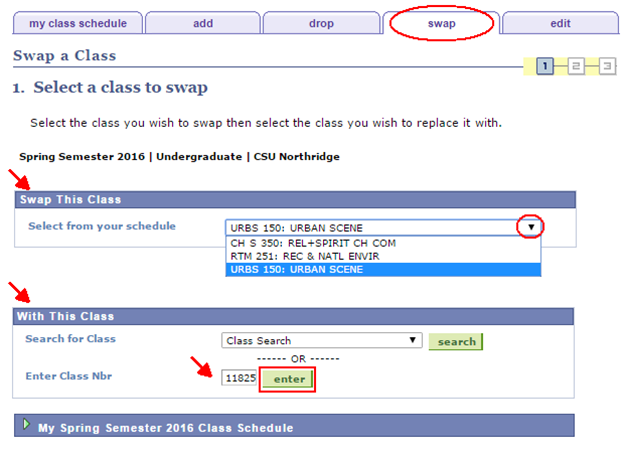
To swap classes, select the Swap tab.
- In the Swap This Class section, use the drop down menu to select a class to swap from your current schedule.
- In the With This Class section, search for a class or enter the five-digit class number of the class you want to add.*
Step 7
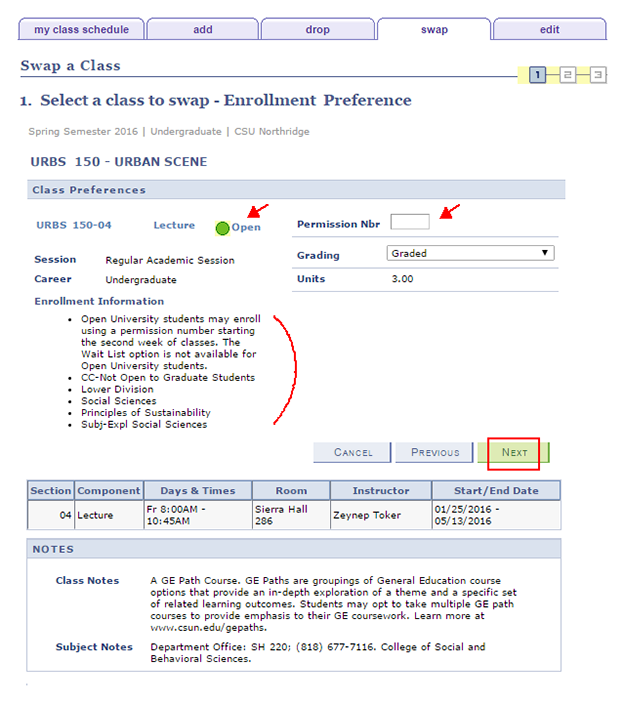
The Enrollment Preferences page displays the class you want to add. Do the following:
- View class status (open or closed).
- Enter the permission number if department or instructor consent is required.
- Optional: Change the grading basis. Check with an advisor first or review the Grading Policy.
- Review Enrollment Requirements. Concurrent enrollment in another class may be required.
- Review Notes for additional course information and requirements.
Step 8
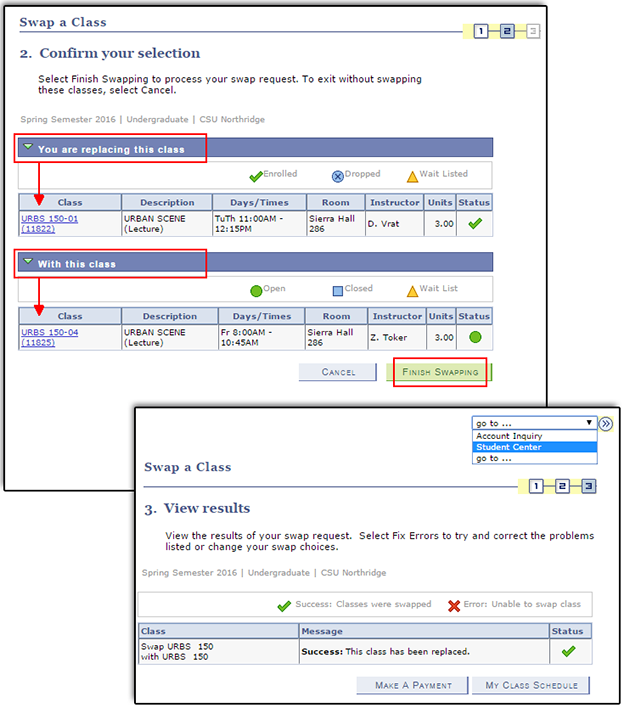
- The Confirm Your Selection page displays. Review the classes to swap. To exit without swapping the classes, select the Cancel button. If satisfied with your selections, click Finish Swapping to process your request.
- The View Results page now displays to report the status of your swap request—Success or Error. If successful, click Make a Payment or My Class Schedule.
![]() Always review your class schedule, account balance, and payment due dates after any changes to avoid disenrollment. Print a copy of your schedule for your records.
Always review your class schedule, account balance, and payment due dates after any changes to avoid disenrollment. Print a copy of your schedule for your records.
