4
|
The Many Views of Your
PowerPoint Presentation
|
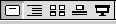 There are five different
ways you can view your PowerPoint document. To get to each different
view you can use the View buttons located at the lower left of the PowerPoint
application screen next to the horizontal scroll bar (see illustration,
above left). From left to right these are Slide View, Outline View,
Sorter View, Note Pages View, and Slide Show View. All of these view
types can also be found under the View menu at the top of the screen. There are five different
ways you can view your PowerPoint document. To get to each different
view you can use the View buttons located at the lower left of the PowerPoint
application screen next to the horizontal scroll bar (see illustration,
above left). From left to right these are Slide View, Outline View,
Sorter View, Note Pages View, and Slide Show View. All of these view
types can also be found under the View menu at the top of the screen.
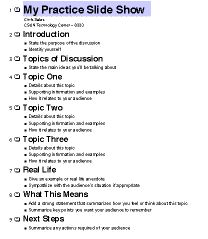
Slide View
Slide View shows you each individual slide, one at a time (see illustration
below).
In this view you can edit and change text, fonts, placement of objects,
insert objects, and generally manipulate anything on the slide (except
what is on the master slide). The background and text colors were chosen
for you based on what experts in the field have found to work best for
your chosen type of presentation. It is possible, however, for you to change
these selections if you wish.
Advance through the slides by pressing the up and down buttons on the
lower right corner of your screen. You can also use the scroll bar to quickly
go to a slide (notice how it tells you numbers of the slides as you scroll).
Outline View
Outline View displays a "text-only" version of your presentation (see illustration
below).
Since you want your presentation to be content-driven, outline view can
import or cut-and-paste your text from a word document. Notice that each
slide is numbered on the left. You can also edit the content, move parts
of or entire slides, and demote/promote (indent/unindent) content.
| Hints: (1) To select an entire slide, move the cursor over to
the little icon on the left of the slide until the cursor changes into
a cross-hair and then click on it. (2) To indent/unindent, use the green
arrow buttons Double-click on a word to highlight it. |
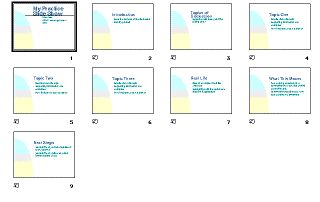
Sorter View
Slide sorter view displays all of your slides as thumbnails (see illustration
below). From this view you can see if things line up between the slides
the way you want them. You can also select a slide and drag it to a new
location, or cut a slide and paste it to a new location. Transitions and
effects are created from this view as well (see Part
6, "Building Transitions and Effects on Your Slides").
Notes:
-
You can select more than one slide by holding down the SHIFT
key and clicking on each of the slides you want.
-
By changing (i.e., increasing) the zoom setting in slide view you can better
read the content on the thumbnails.
|
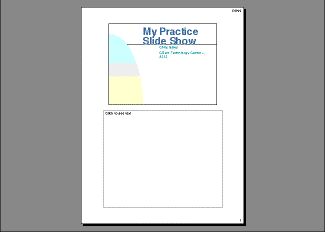
Note Pages View
Note Pages View is the template for printing a script or notes for yourself
on paper to go along with each slide (see illustration below).
This is very handy if you give the same presentation, say, about
every month or so, and you haven't had time to review your notes but you
want to remember to say the same things each time. You can create your
own printed guide for your presentation including the details that your
individual slides don't show, as well as give yourself reminders of supporting
research, credit/attributions for graphs, photos or content, and even jokes!
It is also handy for when you must let someone else give your presentation
for you because all the supporting notes and information can be included
for each slide.
| Note: You might want to change the font style, size, and/or
color to help you see your notes better. |
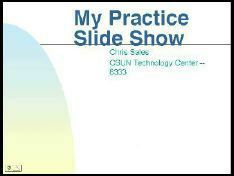
Slide Show View
Slide Show View shows you how your presentation (or transparency slides)
will look when you project it on a screen (see illlustration below). Use
your SPACEBAR
or mouse-click to advance to the next slide or use the up/down arrows
to advance and go back. Tap the ESC
key to exit this view.
You also have a "pen" option in this view: Move the mouse a little
and a small button appears on the lower right corner of the screen. Click
on that button and a pen icon appears. You can use the pen icon to draw
on the screen. Note that the pen is only temporary. To "erase" your pen-marks,
advance to the next slide.
|