Newsletter
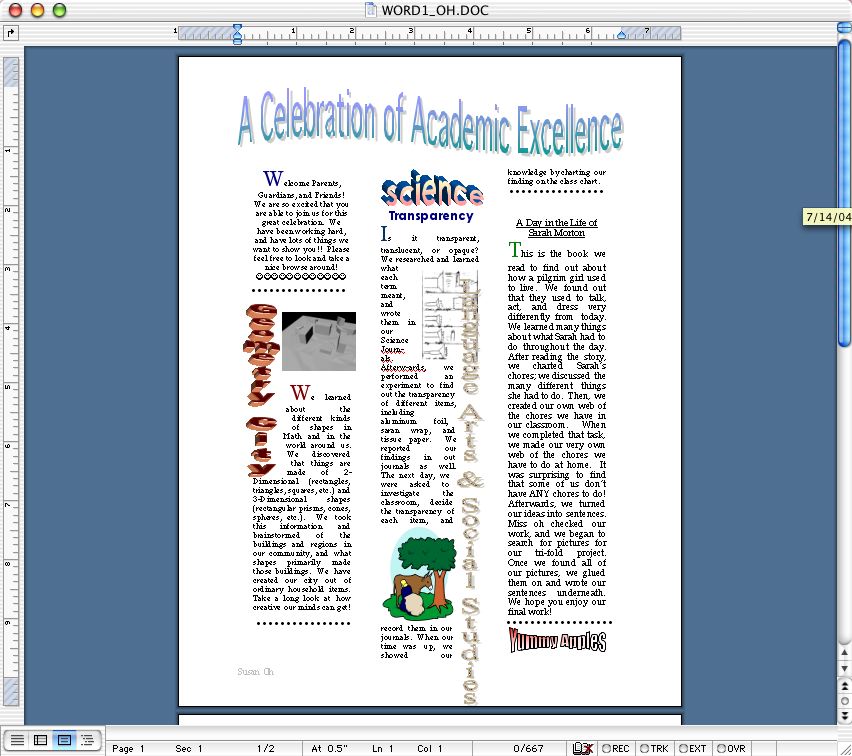
For this assignment, you will make a newsletter. Similar to most of the assignments, your assignment will need to be educational related (ex. to students, staff, co-workers, parents, organizations, etc.)
Step 1
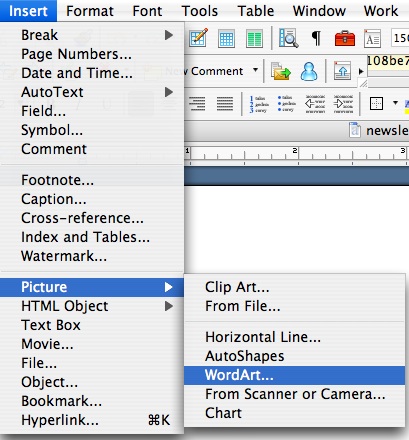
Insert>Picture>WordArt... |
Step 2
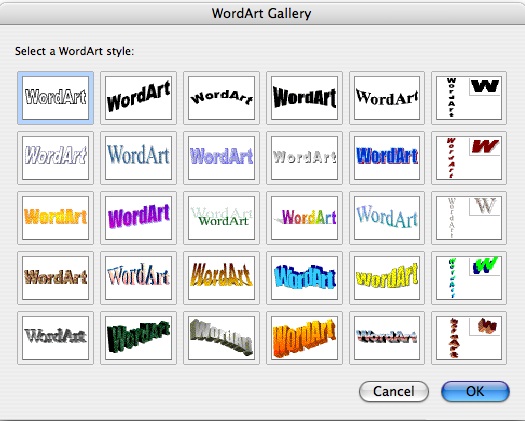
Select a Word Art that you like. If you want to change at a later time, you can delete the original and redo step 1. |
Step 3
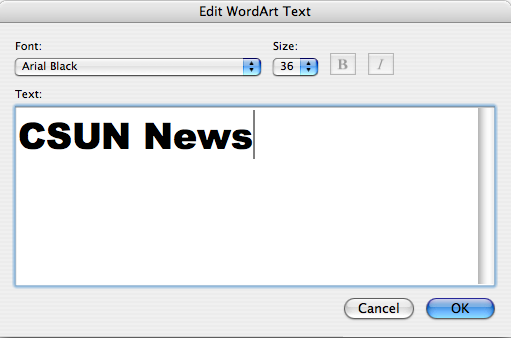
Type in what you want your Word Art to say and then click OK |
Once you insert your title, the word art will probably appear in
the middle of the document. From
there, you can resize the word art and then you will want to move the word
art to the top.
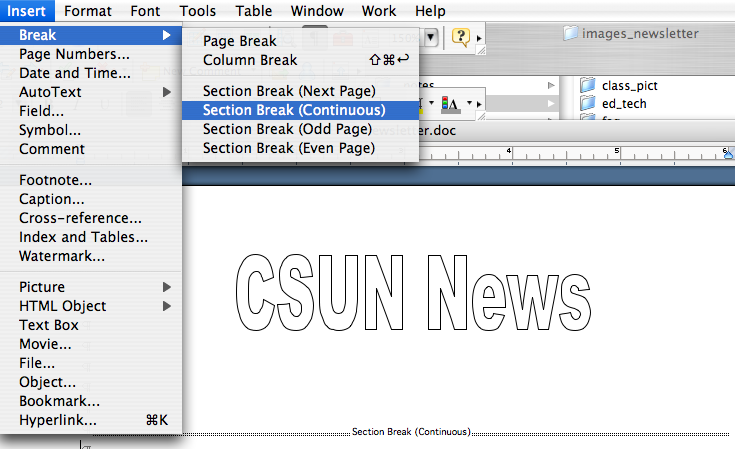
Place your blinking cursor below your word art and enter a continuous section break. To do this, select Insert>Break>Section Break (Continuous). In order to see the section break, you will need to have the Show/Hide selected (to do this, you will want to select the paragraph symbol located on the Standard toolbar)
You are now ready to insert columns. Prior to doing this step, make sure your cursor is below the title and section break that you have created. If so, you are ready for the next step. You can choose to have 2 or 3 columns and you can also choose to have a line to divide the columns if you like. To insert columns, click on the columns icon and choose the number of columns that you want. The column icon is the one in directly under the word Table in the picture below. You can also access the columns by choosing Format>Columns.

Now that you have your columns set, you will want to type in the text and insert your pictures (at least two pictures from the following, downloaded from the Internet or personal picture) as you see fit. Keep in mind that you may not see the columns when you are working, but they are there and you can preview them by going to Print Preview which can be accomplished by selecting File>Print Preview. To get out of print preview, choose close.
To download from the Internet, complete the following...
In this section, you will learn how do download
or copy pictures. Just about every image or picture that you see on the
Web is downloadable. Keep in mind when you download an image, you will want
to save the image where you will be able to locate when needed.
1. Open up a browser, either Internet Explorer, Netscape, etc. So that we
will download the same image, lets all go to college of education Web site
(www.csun.edu/coe) and download the torch.
Step 1
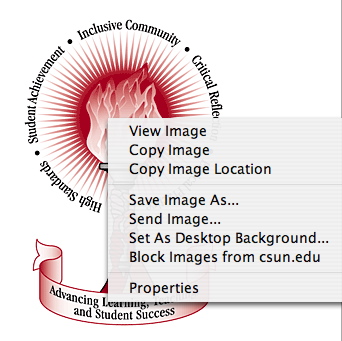
When using a Mac, press and keep the "ctrl" keystroke down which is located near the spacebar and place your cursor on the picture of the torch and press the mouse once and a menu will appear. |
Step 2
Once the menu appears, choose the "Save image as or Download Image to Disk." and you will now want to navigate and save this in the correct location. |
Hint: Hollow Grab Bars
When using Microsoft, your images that insert will initially have solid grab bars and you will want to change that image so that the image will have hollow grab bars.
Formatting Picture
Once the image has been inserted into your document, you will want to double click on the image so that the Format Picture menu appears. Choose Layout from the top and select either Square or Tight to make the grab bars change from solid to hollow. |
solid grab bars
|
hollow grab bars
|
Now that you have the image saved, you will want to place your image onto
your document (once the image is inserted, change the grab bars from solid
to hollow).
Step 1
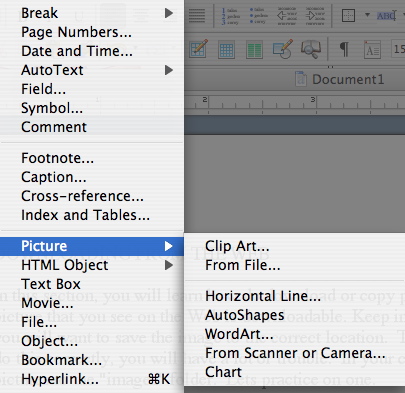
go back to your document and choose Insert from the toolbar then Picture>From File. |
Step 2
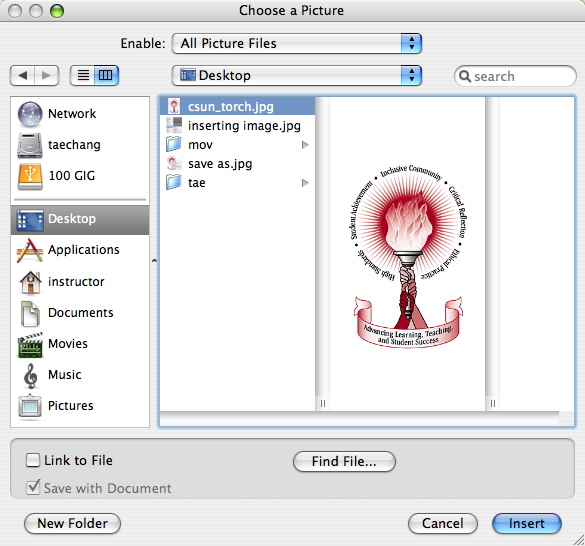
Locate the file and select it. In my example, I called the file csun_torch.jpg |
Other features to keep in mind when working with Microsoft Word.
- Spell and Grammar Check
- Thesaurus
- Find and Replace
- Header and Footer
- Landscape and Portrait
If you meet the minimum requirements, you will earn a B on the assignment. Feel free to look at other students finished assignment as samples.
- Word Art
- Graphics
- Continuous Section Break
- Columns
Sample
